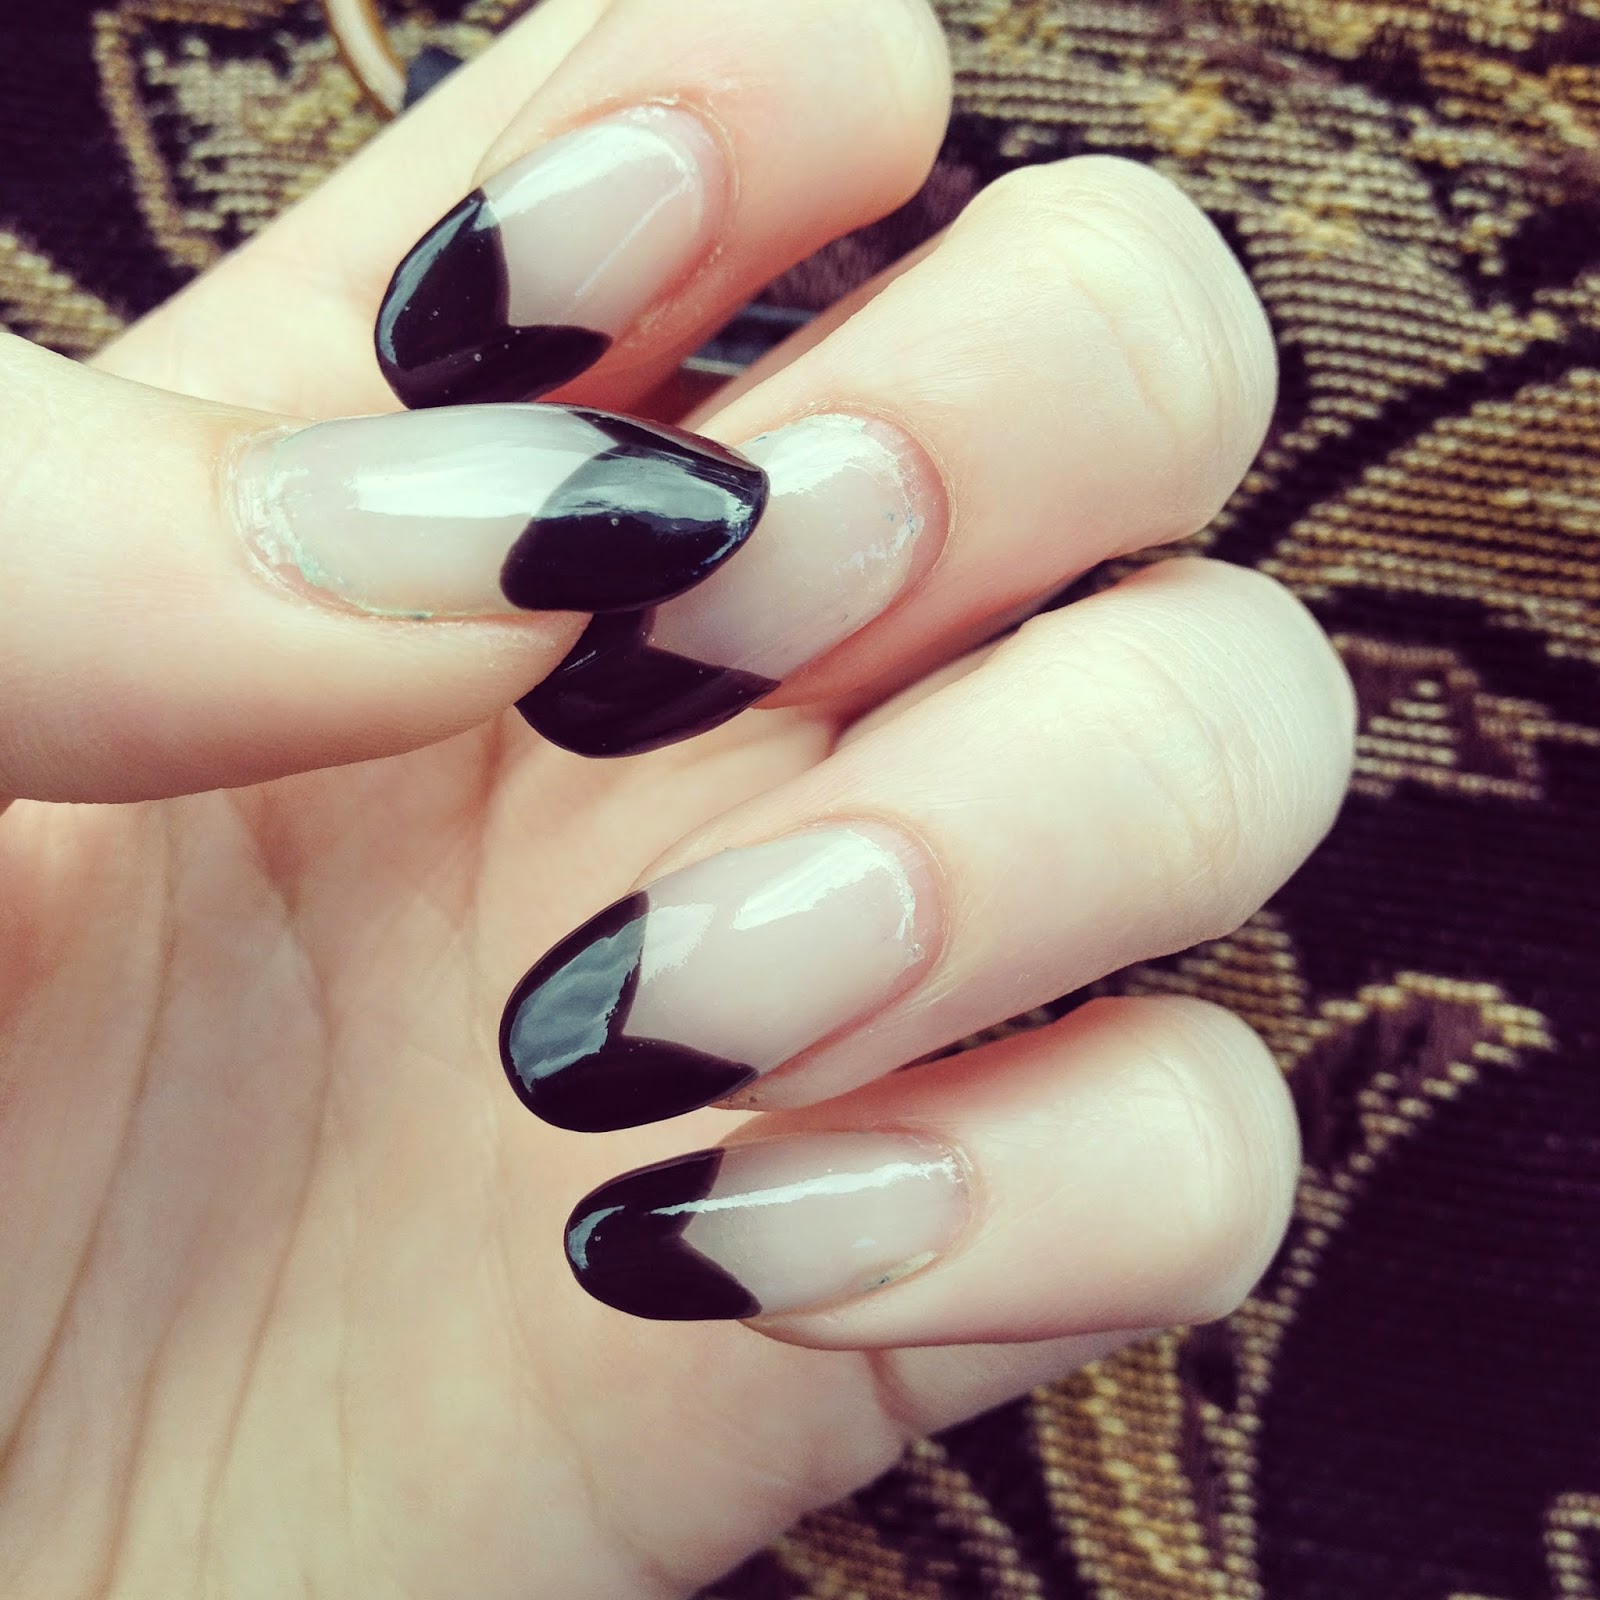
In this post, I am going to TRY and explain how to do this nail design which I feel will not be leaving my nails for a long time.
All you need is ...
1. A base coat for your nails
2. (Optional) A pale pinkish / natural nail colour but better colour.
3. A nail polish colour of your choice.
4. A thick top coat.
Step one: I apply a base coat and wait 2 minutes for this to try. Then I apply Essie - Mademoiselle nail polish. I adore this colour so much as it makes your nails look so healthy and pretty. You can get it from any Essie counter towards the paler colours. I applied two coats of this, waiting 5 minutes in between each one. So this step takes 10-15 minutes in total.
Step two: The tricky part. Next use any colour you wish, I used black but I have seen this done with red before also. I chose the Barry M one as it has a smaller applicator than many other brands so its easier to do the design. All you want to do is start at one side of your nail 3/4 of the way up, and bring the polish to the center of the tip of your nail. Try to curve the line so it doesn't look too harsh. This will make it look more playful and heart like. Although this is totally optional. I find it best to start with the hand you struggle with most first. Do the 'triangle' in two steps - one side, and then the other, this will connect them together. I find it best to start with the side which is furthest from you. If the colour you have chose isn't very opaque, then just slowly and carefully go over your design.
Step three: Wait for this to dry. It will take quite a while as its a thick layer of polish over a small area. Take 15 minutes out and try not to move! Trust me, you'll regret it! Make sure they're dry and apply your chosen top coat.
And there you go! An easy method for which I think, super wonderful design! I find it best for this design to have a rounded/almond nail shape like mine.
xxx


